
Creating high-quality music no longer requires an expensive studio. With the right tools and a bit of know-how, home vocal recording is something most musicians can achieve when they set their mind to it. Whether you’re a singer, podcaster, or songwriter, recording at home can give you the freedom to capture ideas whenever inspiration strikes. We’ve put together this guide to walk you through the essentials of getting clean, professional-sounding vocals without leaving the comfort of your house.
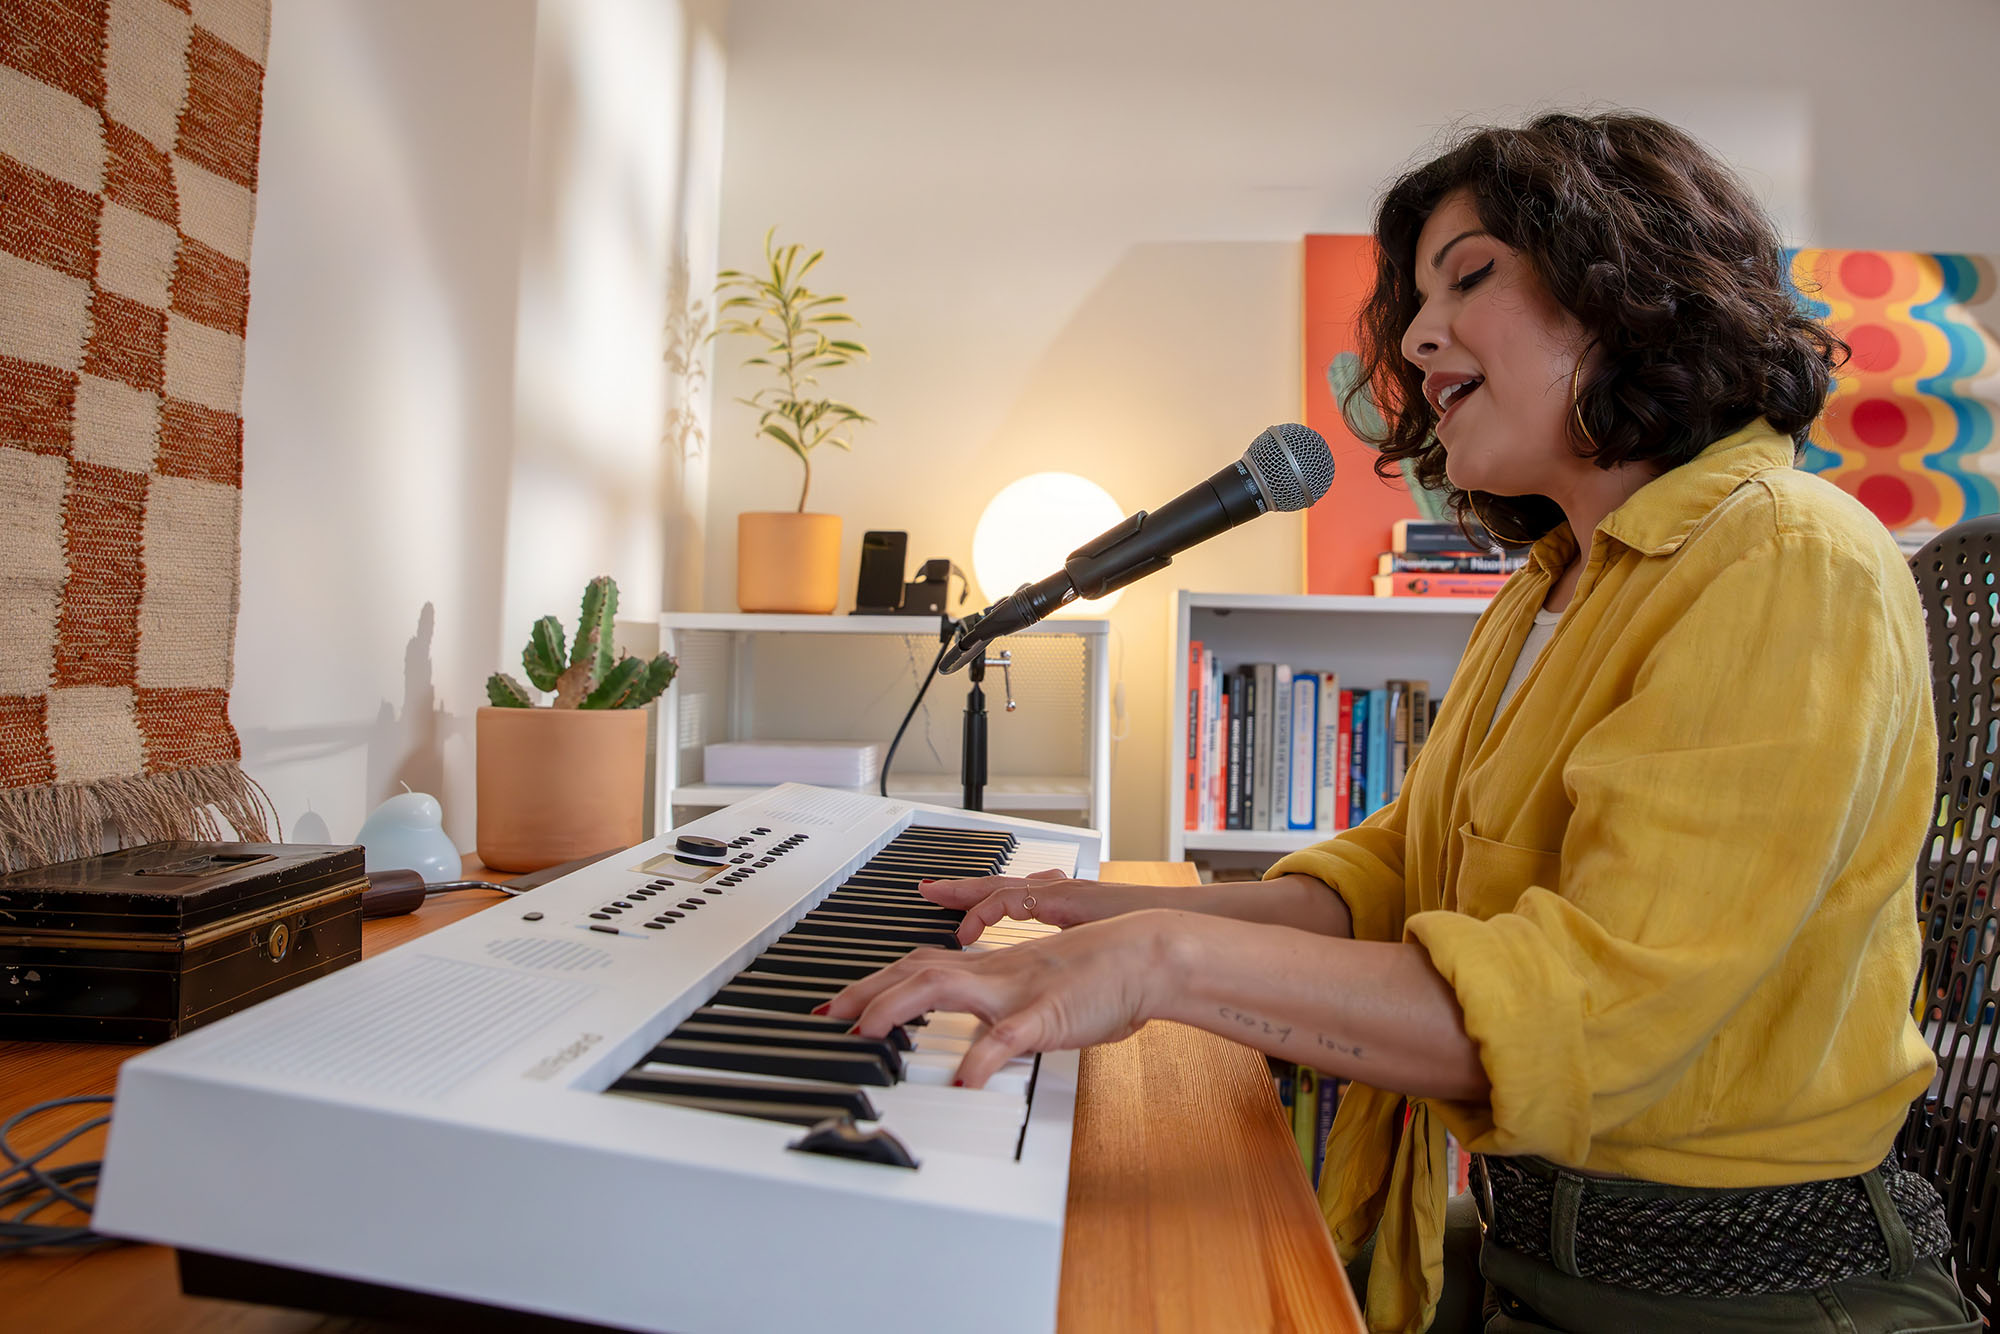
One of the most important parts of home vocal recording is picking the right microphone. The mic you choose has a huge impact on the sound you capture. Here are a couple of our favourites.
This compact microphone is perfect for beginners or anyone looking for a simple, no-fuss solution. It comes with a sturdy XLR-jack cable and is available in sleek black or white. Dynamic microphones are great for reducing background noise, making them ideal if you’re recording in a home environment that isn’t fully soundproofed. Its affordability and durability make it a smart choice for singers just starting out or for multi-purpose use (from vocals to podcasting).
For those who prefer a plug-and-play option, this foldable USB microphone is a versatile choice. Also available in black or white, it connects directly to your computer, meaning you don’t need any extra equipment like an audio interface. The foldable design makes it easy to store or transport, while still delivering clear, professional-sounding recordings. It’s perfect for home vocal recording, streaming, or recording demos with minimal setup.
What we love about both of these microphones is that they demonstrate you don’t need to spend hundreds of pounds to get a good-quality home vocal setup. Whether you prefer the traditional XLR approach or the convenience of USB, these options make it easier than ever to start recording in your own space.
Where you place the microphone is just as important as the model. Small adjustments can make a big difference to clarity. For the best home vocal recording results:
A good pair of headphones is equally important when it comes to home vocal recording. Closed-back headphones are ideal because they prevent sound from leaking into the microphone while allowing you to hear every detail of your performance. Look for headphones that are comfortable for long sessions and deliver a balanced, clear sound so you can accurately monitor pitch, tone, and dynamics. It’s a good idea to try before you buy if you can. Investing in quality headphones helps ensure your recordings are precise and professional from the very first take. Our top picks include:
Setting up your space is a key step toward achieving professional sound. Hard surfaces like bare walls and windows will cause echoes and reflections that you don’t want. Record in a small, soft-furnished room with curtains, rugs, or cushions to reduce echo if you can. You can also try hanging thick blankets behind the microphone.
Good technique is just as important as good equipment. Keep a consistent distance from the microphone and try not to move around too much. Sudden changes in distance can cause volume jumps that are hard to fix later. A short vocal warm-up can also transform your performance. Simple breathing exercises, scales, or gentle humming will help you sound more confident and relaxed. Even with the best setup, great recordings still rely on good singing or elocution.
When recording vocals at home, aim for healthy levels without distortion. In your recording software:
Once you have recorded your vocals, a few simple editing steps can make them sound more professional. Equalisation (EQ) lets you shape the tone of your voice. A gentle boost to the higher frequencies can add clarity, while cutting some low rumble can make vocals cleaner. Compression helps even out the volume. This makes the vocal sit better in a mix and sound more controlled. A small amount of reverb can give vocals a natural, studio feel. Just be careful not to overdo it - subtle effects usually work best for home recordings.
Nowadays, most recording programmes include everything you need. Popular options such as GarageBand, Audacity, and Logic make home vocal recording simple, even for beginners.
Like any skill, home vocal recording improves with time. The more you practise, the better you will understand your voice, your equipment, and your room. Start with basic tools, focus on good technique, and upgrade your setup gradually. You’ll be amazed at how professional your recordings can sound.
What equipment do I need for home vocal recording?
At a minimum, you need a microphone, headphones, an audio interface, and recording software. A pop filter and mic stand are also very useful.
Can I record good vocals without a treated room?
Yes. While acoustic treatment helps, you can still get strong results by using soft furnishings, blankets, or recording in a small, quiet space.
Which microphone is best for recording vocals at home?
Most people use a condenser microphone for detailed studio-style sound. Dynamic microphones are better if your room has more background noise.
How loud should vocals be recorded?
Aim for peaks between –10 dB and –6 dB. This gives you a clean signal without distortion.
Is free recording software good enough?
Absolutely. Free tools like Audacity or GarageBand are more than capable of producing high-quality home vocal recordings.
Mon - Sat: 10am-5pm
Sunday: Closed

99-101 Fore St.
Exeter
Devon
EX4 3HY
United Kingdom
Mon - Sat: 10am-5pm
Sunday: Closed